
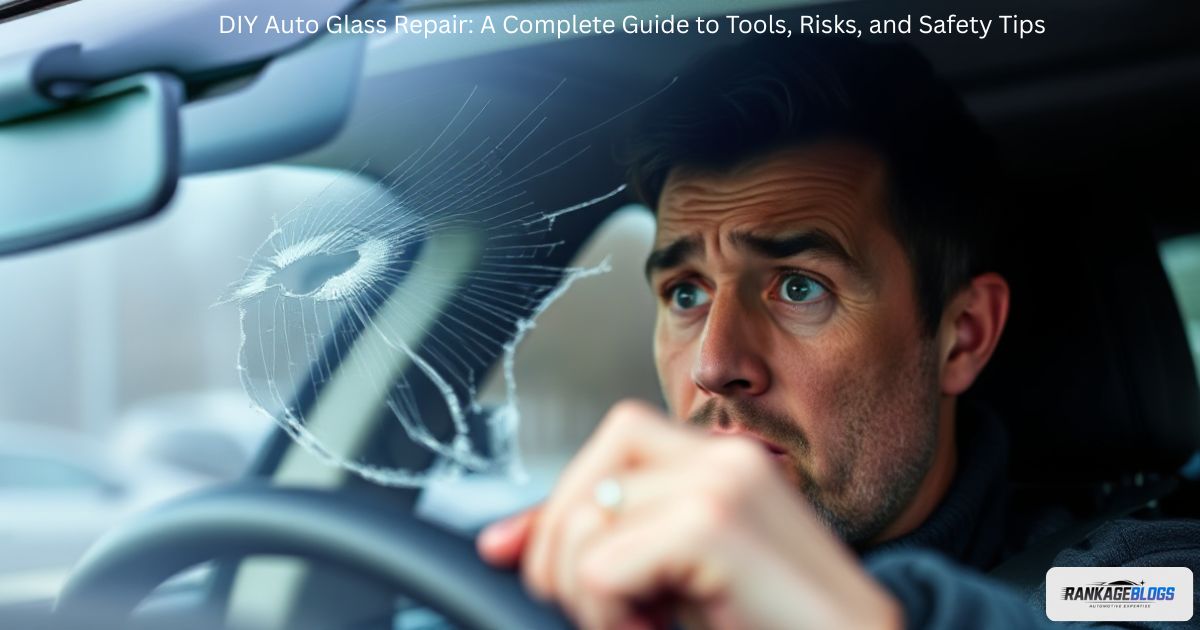
That moment you notice a new windshield chip or windshield crack can be incredibly frustrating. You’re faced with a common dilemma: attempt a quick, affordable DIY auto glass repair or schedule a professional repair.
This guide is designed to navigate that exact crossroads. We’ll provide a balanced, honest look at the entire process, from the repair resin in a kit to the long-term risks. Our goal is to equip you with all the knowledge you need to make an informed choice that prioritizes your safety, your wallet, and your vehicle’s structural integrity.
What Is DIY Auto Glass Repair?
Before diving into a project, it’s crucial to understand what DIY auto glass repair truly entails. This approach involves using an off-the-shelf kit to address minor auto glass damage yourself, bypassing a professional auto glass technician.
It’s marketed as a convenient solution, but it’s vital to grasp its limitations and intended purpose from the start. This section will break down the mechanics and realistic outcomes of DIY auto glass repair, a popular yet often misunderstood process.
How DIY Repair Kits Work
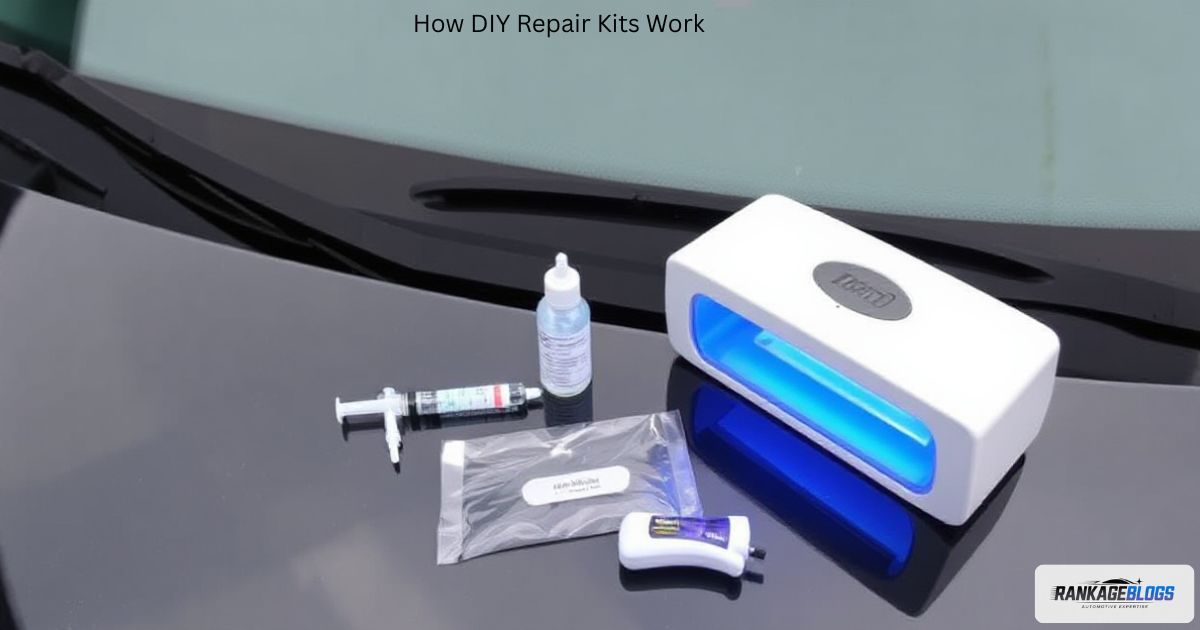
A typical windshield repair kit operates on a simple principle: it uses a special repair resin to fill the void left by a chip or crack. The process usually involves creating a vacuum seal over the damage with an adhesive disc and pedestal. You then use a resin applicator or syringe to inject the liquid polymer into the breach.
The resin is designed to seep into every tiny crevice, bonding with the glass and restoring a degree of clarity and strength. Once the damaged area is fully saturated, the next step is the curing process, which hardens the resin and completes the DIY windshield repair.
The Goal of a DIY Fix
It’s essential to manage expectations about what a DIY windshield repair can achieve. The primary goal is often to prevent a small windshield chip from spreading into a larger windshield crack, which would necessitate a full windshield replacement.
A secondary aim is cosmetic improvement—making the damage less noticeable. However, it is crucial to understand that this method rarely, if ever, fully restores the original structural integrity of the glass. It is a functional patch, not a perfect, invisible, or factory-strength restoration.
Weighing Your Options: The Pros and Cons of DIY Auto Glass Repair
Deciding whether to tackle a repair yourself requires a clear-eyed view of the advantages and drawbacks. Understanding the pros and cons of DIY auto glass repair helps you evaluate if this path aligns with your skills, the damage’s severity, and your tolerance for risk. This balance between initial savings and potential long-term costs is the core of your decision.
Pros of DIY Auto Glass Repair
The appeal of a DIY windshield repair is straightforward. The most significant advantage is the low initial cost; a kit is far cheaper than a professional service.
There’s also the convenience of addressing the damage on your own schedule without needing to visit a shop or wait for a mobile technician. For a small, superficial bull’s-eye chip away from critical areas, a DIY fix can be an effective way to repair a small chip at home and stop it from growing, buying you time.
Cons of DIY Auto Glass Repair
The risks of DIY windshield repair are substantial and often downplayed. The potential for risk of failure is high, especially for inexperienced users. A botched job can lead to safety issues like obscured vision from a poor finish.
Furthermore, these kits offer no warranty; if the repair fails, you bear the full cost of a subsequent professional repair or windshield replacement. Crucially, a DIY job may void your car warranty coverage for related issues and could lead to insurance complications if the repair is not approved.
Essential Tools and Materials for DIY Auto Glass Repair
Embarking on a DIY windshield repair requires more than just a kit; it demands an understanding of the components and their roles. Using the right tools needed for chip repair is fundamental to even a chance of success. Using subpar materials or incorrect equipment almost guarantees a poor outcome, compromising both the look and safety of your repair.
Repair Resin: The Core Component
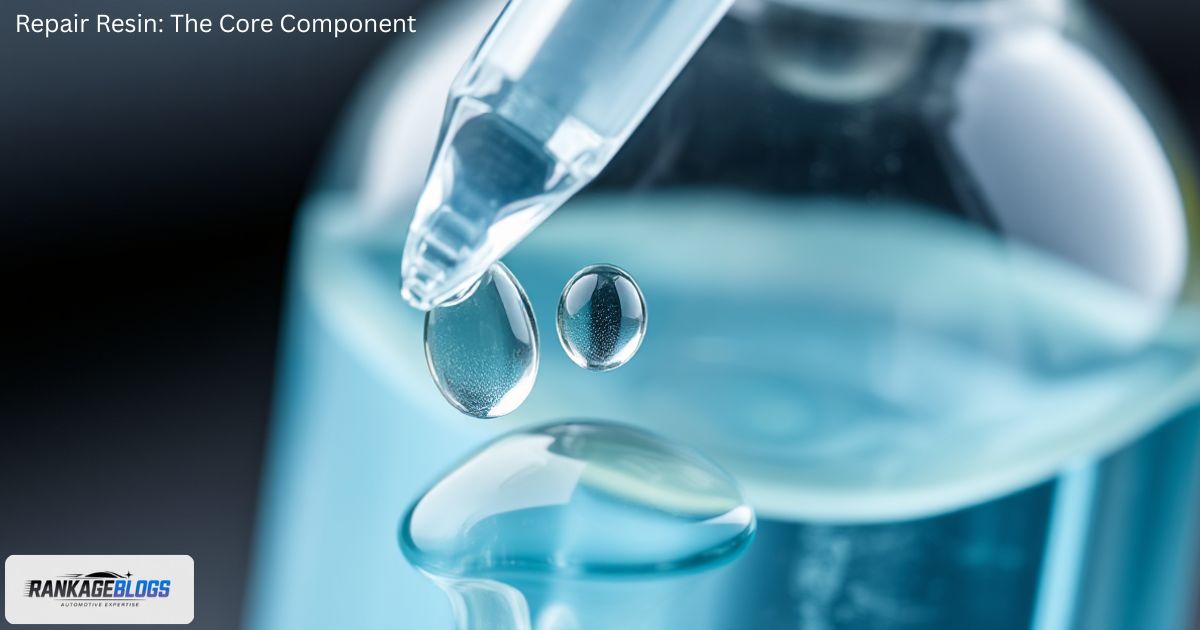
The repair resin is the heart of any kit. This liquid polymer is specially formulated to bond with glass. Its quality and optical clarity are paramount; low-grade resin can dry yellow or cloudy, creating significant visual distortions.
The resin must have the right viscosity to flow into the deepest parts of a windshield crack without air pockets. Using high-quality repair resin is the single most important factor in determining whether you can successfully fix a chipped windshield yourself.
Application Tools: Bridges, Injectors, and Syringes
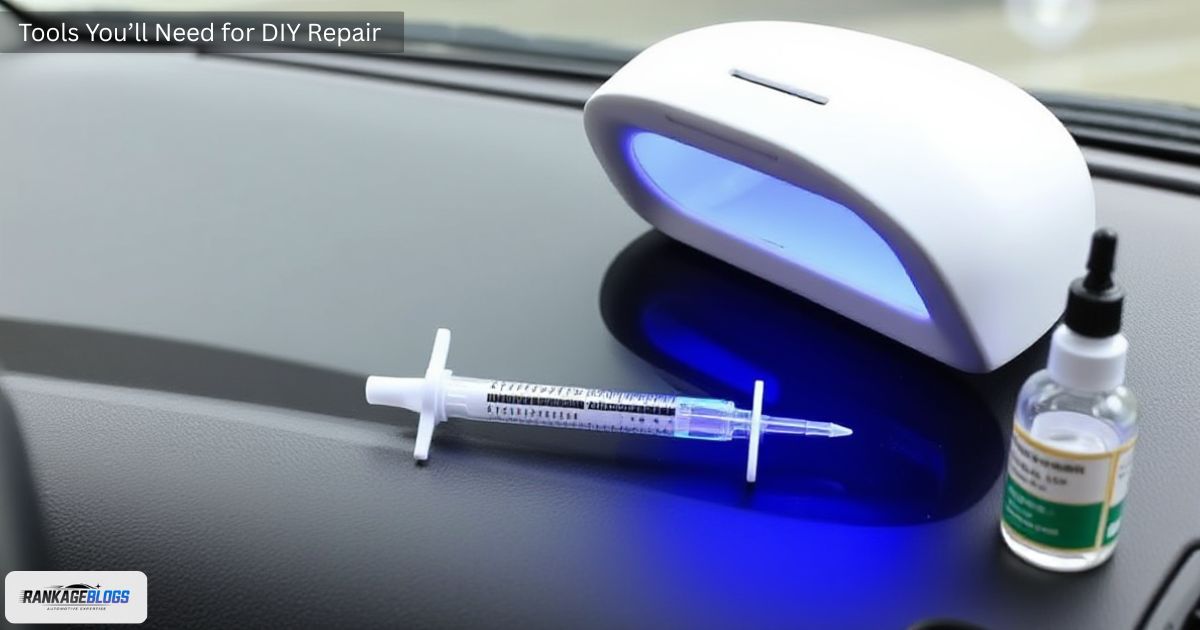
Getting the resin into the damage requires precise tools. Most quality kits include a resin applicator like a syringe, injector, or a bridge device. The bridge mounts to the windshield via an adhesive disc, creating a stable platform over the chip.
This allows you to control the resin application process meticulously, applying pressure to force the resin deep into the damage. Using the correct application tools is essential to avoid creating air bubbles that weaken the repair.
Curing Methods: UV Light vs. Sunlight
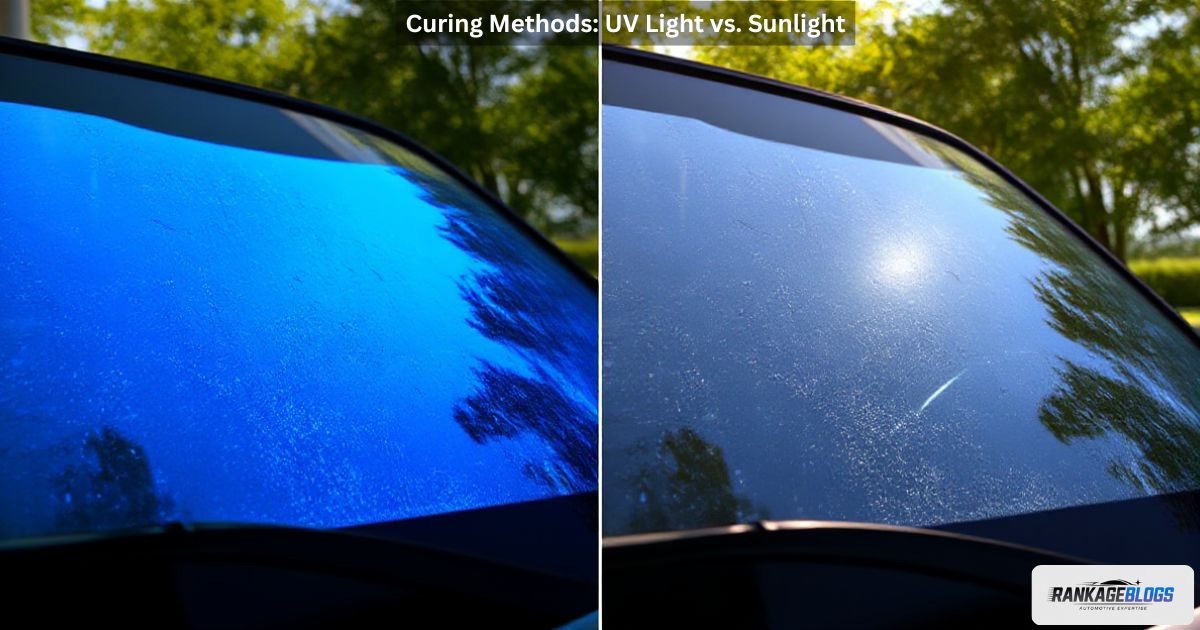
The curing process hardens the liquid resin into a solid. Professional technicians use a powerful curing light (UV light) for fast, reliable results. DIY kits, however, often rely on sunlight, creating a significant drawback.
The UV light vs. sunlight debate is one-sided; sunlight is unreliable. Its intensity varies with weather, time of day, and season, leading to incomplete resin hardening. This is a major reason why how to cure resin without UV light is a common search, as DIY results are often inferior.
Preparation and Safety Gear
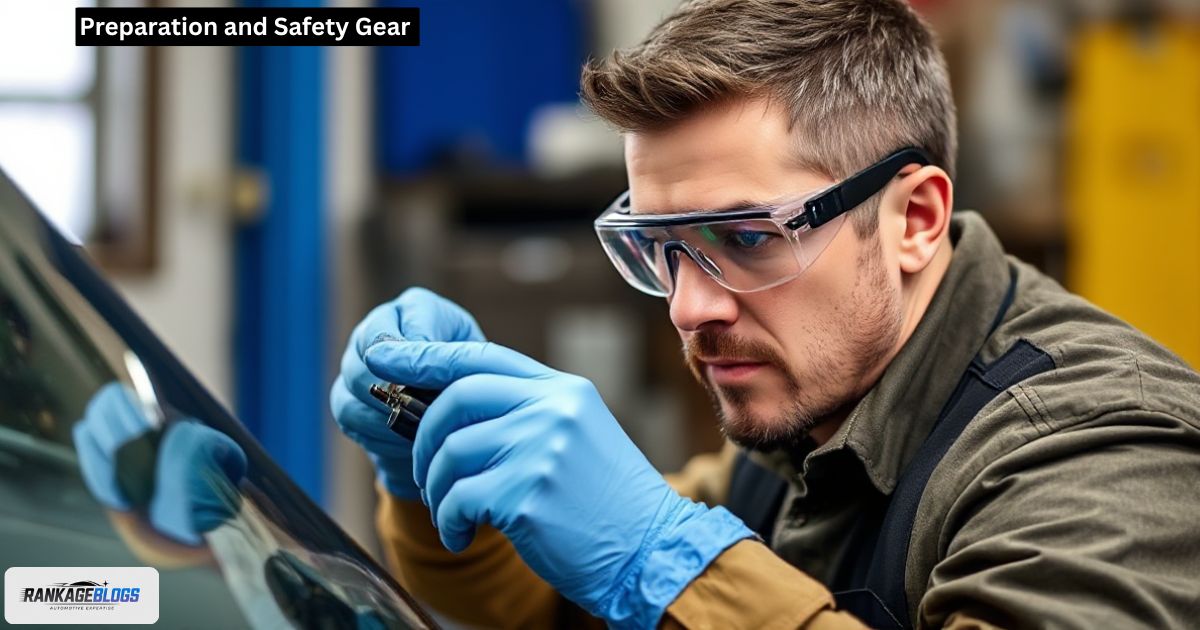
A successful repair starts long before the resin comes out. Proper preparation is non-negotiable. You must thoroughly clean the area with a glass cleaner and use a razor blade to gently remove any loose glass fragments and ensure a clean bonding surface.
Safety gear is equally critical. Safety glasses protect your eyes from flying glass shards, and gloves (part of protective clothing) shield your hands from sharp edges and prevent skin contact with chemicals.
Where to Buy Quality DIY Kits
If you decide to proceed, sourcing a reliable kit is key. You can find them at most auto parts stores or online retailers. When searching for the best auto glass repair kit, look for brands with strong reviews that include a UV curing light, not just those relying on sunlight.
Reputable retailers like AutoZone, Advance Auto Parts, or Amazon offer a range of options. Always check for kits that include a curing light rather than relying solely on sunlight for the curing process, as this significantly improves the odds of proper resin hardening. Read product descriptions carefully to ensure the kit includes all necessary application tools and clear instructions. Remember, even the best DIY windshield repair kit has significant limitations.
Safety Precautions for DIY Auto Glass Repair
Safety must be your top priority when considering any DIY auto glass repair. The process involves handling sharp glass and potentially hazardous chemicals, making proper precautions non-negotiable. Rushing in without a safe workspace setup and the right personal protective equipment can turn a simple repair attempt into a dangerous situation with lasting health risks.
Handling Toxic Resins and Chemicals
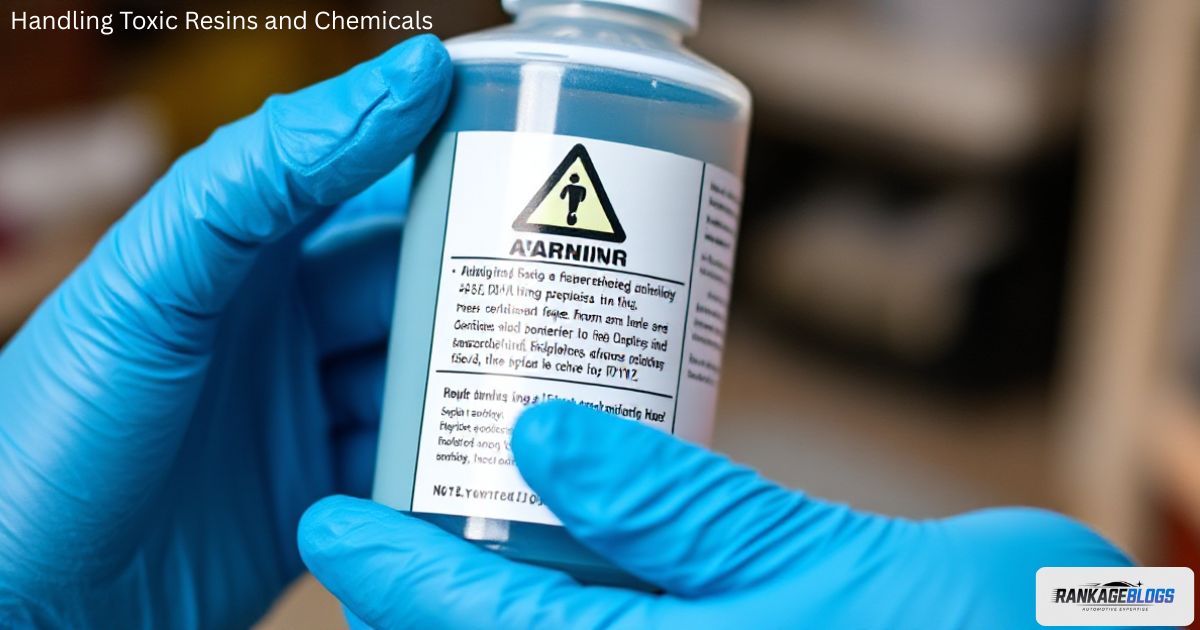
The repair resin in many kits is a chemical compound that can release toxic fumes. These vapors can irritate your lungs, eyes, and mucous membranes. It is absolutely essential to work in a well-ventilated area—ideally outdoors or in a wide-open garage with cross-ventilation. Never work in a closed environment. Immediately wash off any resin that contacts your skin, and avoid touching your face during the process to prevent accidental exposure.
Personal Protective Equipment (PPE)
Never attempt a repair without wearing the appropriate Personal Protective Equipment (PPE). Safety glasses are mandatory to protect your eyes from tiny glass shards that can flick up during cleaning or from accidental splashes of resin.
Durable gloves are equally important, serving as a barrier between your skin and both the sharp edges of the windshield crack and the chemical repair resin. This safety gear is your first line of defense against injury.
Safe Workspace Setup
A safe workspace setup minimizes risks and helps you achieve a better repair. Park your car on a level, stable surface and ensure the parking brake is firmly engaged.
Keep your DIY windshield repair kit components organized and within easy reach to avoid spills or accidental contamination of the repair resin. Have a trash bag handy for used materials like adhesive discs and paper towels. A calm, organized approach is a safe approach.
Assessing Your Damage: When is DIY a Viable Option?
Not every windshield chip is a candidate for a DIY windshield repair. Honestly assessing the damage is the most critical step before you even open a kit. Attempting to fix the wrong type, size, or location of damage will almost certainly lead to failure, potentially compromising your structural integrity and obscured vision. This evaluation will save you time, money, and ensure your safety on the road.
Size Matters: Chips Smaller Than a Quarter
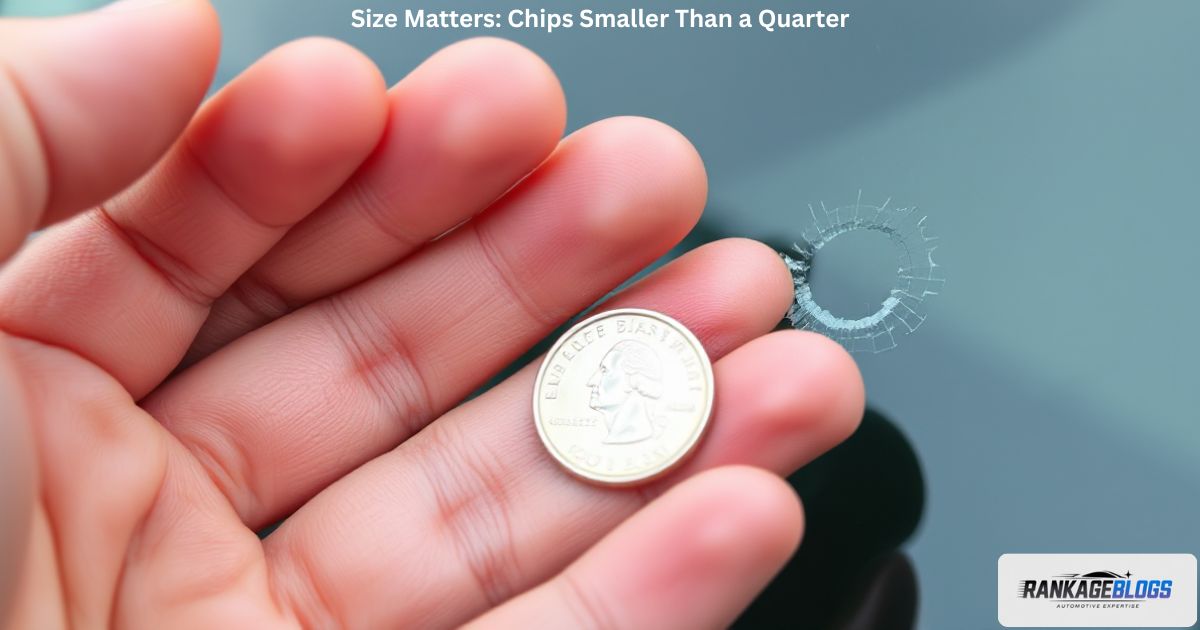
The golden rule for a potential DIY fix is size. As a general guideline, a windshield chip should be no larger than the diameter of a quarter (about 1 inch). A windshield crack should ideally be shorter than a dollar bill (about 6 inches).
Damage larger than this is simply too extensive for the limited amount of repair resin in a consumer kit to fill effectively. The structural integrity of the glass is too compromised, making a full windshield replacement the only safe option.
Location, Location, Location: Avoiding Critical Zones
Where the damage is located is just as important as its size. The driver’s line of sight is an absolute no-go zone for a DIY attempt. Any repair, even a professional one, can leave minor distortions.
In your direct field of view, these distortions can create a dangerous blocked view. Similarly, damage on the windshield perimeter or involving edge damage is off-limits. The edges are critical to the roof’s structural support, and a DIY repair here will fail catastrophically in an accident.
Type of Damage: Simple Chips vs. Complex Cracks
The shape and complexity of the damage determine its repairability. Simple damage like a bull’s-eye chip (a circular break with a cone-shaped piece) or a small star crack are the best candidates. Complex cracks—those that are long, spreading, or have multiple legs—are far beyond the scope of a DIY kit. The resin application cannot properly fill all the intricate channels, leaving the windshield crack weak and likely to continue spreading.
The Technology Factor: ADAS and Windshield Repair
Modern vehicles add a critical layer of complexity. Many cars now have Advanced Driver Assistance Systems (ADAS), which rely on cameras and sensors typically mounted behind the windshield perimeter.
What is ADAS Calibration?
ADAS calibration is the process of precisely aligning these cameras and sensors after a windshield is replaced or sometimes even repaired. It ensures features like automatic emergency braking, lane-keeping assist, and adaptive cruise control function correctly. This is not a DIY procedure; it requires specialized software and targets performed by a certified technician.
Why a DIY Repair Can Compromise Your Safety Features
Attempting a DIY windshield repair near a camera module can have disastrous consequences. Getting repair resin on the camera lens or slightly altering the glass’s optical properties in that zone can disrupt the system’s accuracy. This means your safety features might not work when you need them most, turning a minor windshield chip into a major safety hazard.
The Necessity of Professional Recalibration
This is why many modern vehicles require a professional repair handled by a shop that can perform ADAS calibration. Even if the physical repair seems successful, without proper recalibration, your car’s most important safety systems may be disabled or malfunctioning. This makes consulting a certified technician essential for most late-model cars. To understand the full importance, process, and risks of skipping this step, we strongly recommend reading our detailed guide on ADAS calibration.
Step-by-Step Guide to DIY Windshield Repair
If your damage is suitable and you understand the risks, following a meticulous process is your key to the best possible outcome. This step-by-step windshield chip repair guide will walk you through the sequence, but remember: patience and precision are everything. Rushing any step will almost certainly lead to a failed repair that requires a windshield replacement.
Preparing the Damage Area
The foundation of a good repair is impeccable preparation. Start by thoroughly cleaning the entire area with a high-quality glass cleaner and a lint-free cloth to remove all dirt, dust, and moisture.
Any contamination will prevent the repair resin from bonding properly. Next, use a razor blade held flat against the glass to gently scrape away any loose glass fragments from the windshield chip. This ensures a clean surface for the resin to adhere to.
The Resin Application Process
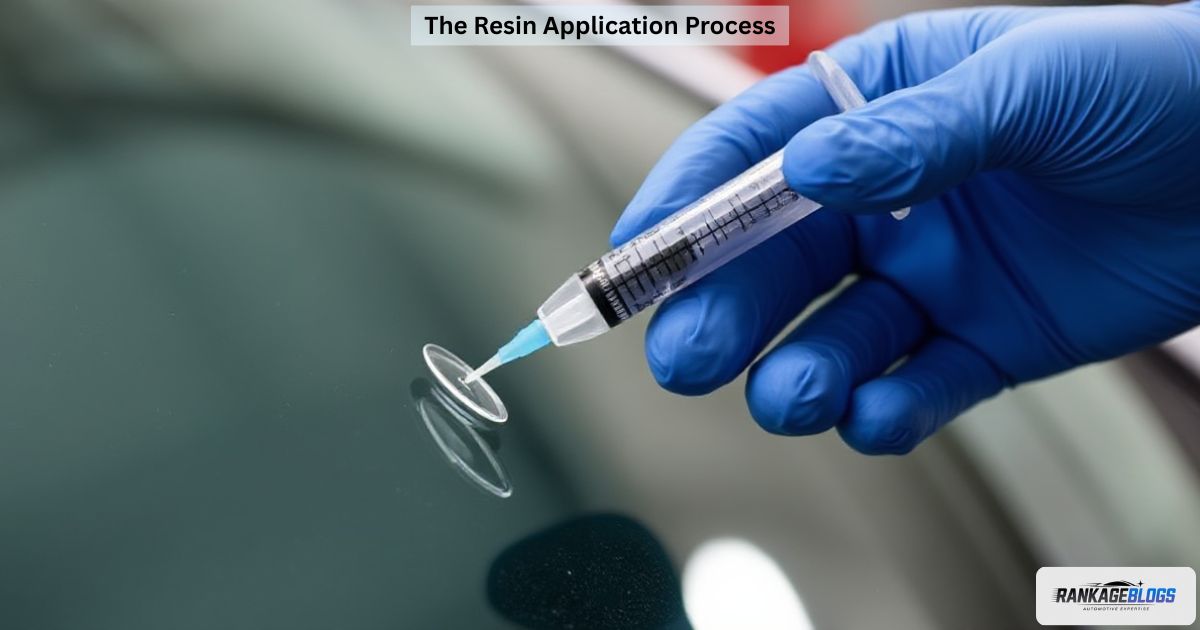
This is the most critical phase. Mount the application bridge securely over the damage using the adhesive disc. Follow your kit’s instructions to slowly inject the repair resin into the chip, applying steady, gentle pressure.
The goal is to force the resin into the deepest part of the crack and push out any air. Watch carefully as the resin flows; this resin application process requires focus to completely saturate the damage and avoid creating air bubbles that will weaken the bond and create visual flaws.
Curing and Hardening the Resin
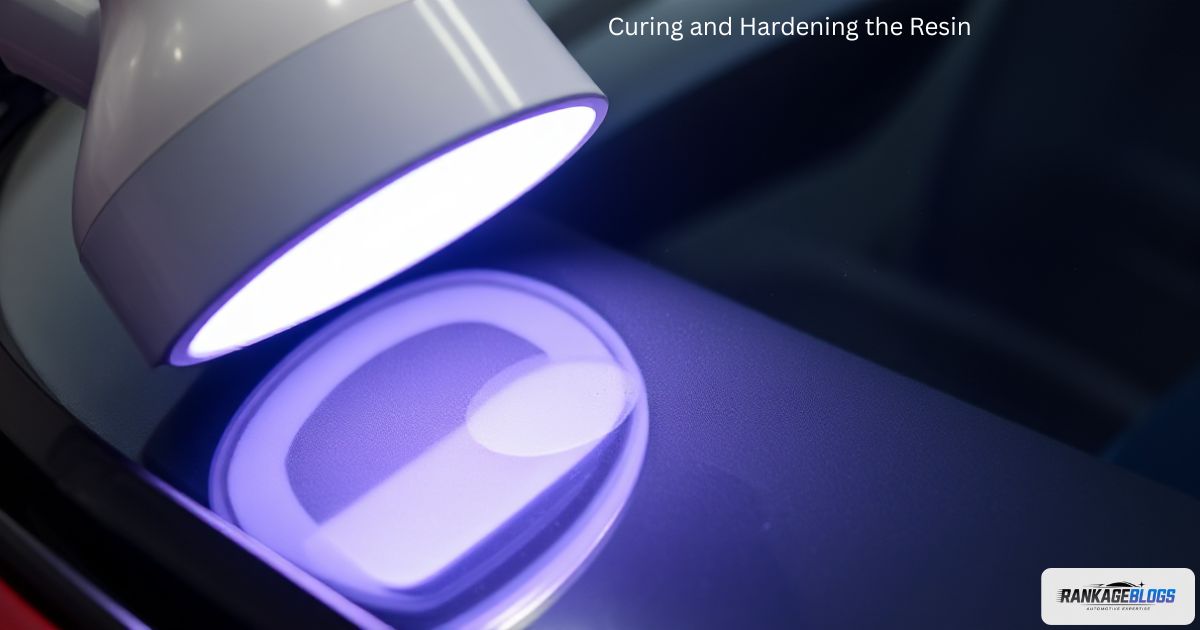
Once the damage is fully filled, you must initiate the curing process. If your kit includes a curing light, use it as directed, holding it over the repair for the exact recommended time. If you’re relying on sunlight (how to cure resin without UV light), park your car in direct, bright sun for the time specified—often several hours. Be aware that temperature and cloud cover can drastically affect results. Proper resin hardening is essential for achieving any durability.
Finishing the Repair
After the resin is fully cured, carefully remove the application bridge and adhesive disc. You will likely see a small mound of hardened resin on the surface. Take a clean razor blade, hold it at a 45-degree angle, and gently scrape the excess resin away until it is perfectly flush with the surrounding glass. Finish by wiping the area clean with glass cleaner to reveal the final result of your DIY windshield repair.
Testing Repair Strength After Completion
After finishing, you can perform a very gentle testing repair strength after completion. After 24 hours, you can lightly press on the repaired area with your finger. It should feel solid and not flex. Look through the repair from inside the car while moving your head; note any significant optical distortions.
You can also try gently tapping the area with a coin; a solid, clear sound indicates better bonding than a dull thud. However, understand that this is not a test of its structural integrity; only professional equipment can truly assess that. This check is only for basic clarity and adhesion and cannot guarantee the repair will hold under stress.
Common DIY Windshield Repair Mistakes and How to Avoid Them
Even with a good kit, it’s easy to make errors that ruin the repair. Understanding these common pitfalls before you start dramatically increases your odds of a tolerable outcome. Most failed repairs that lead people to search “why did my DIY repair fail?” or “DIY repair made my crack worse” can be traced back to these fundamental mistakes.
Failing to Properly Clean the Area
This is the most common and critical error. Any dirt, dust, or moisture trapped in the windshield crack will prevent the repair resin from forming a strong bond. The result is a weak repair that may discolor or fail completely. Solution: Be obsessive about cleaning. Use copious glass cleaner and a razor blade to ensure the chip is absolutely pristine and dry before you begin the resin application.
Introducing Air Bubbles During Application
Air bubbles are the primary cause of ugly repairs that lead to obscured vision. They are introduced by injecting the resin too quickly or not maintaining steady pressure. Solution: Inject the resin slowly and patiently. Watch the resin flow into the crack, pausing if you see bubbles forming. Applying a slight vacuum (if your kit allows) can help draw out trapped air. How to avoid bubbles in windshield repair is a skill of patience and control.
Using Too Much or Too Little Resin
Both extremes cause problems. Using too little resin leaves the chip only partially filled, making it weak and prone to spreading. Too much resin creates a large, difficult-to-remove blob that cures into a major obstruction on your glass.
Solution: Follow the kit’s instructions for the recommended number of drops or amount of resin based on the chip’s size. It’s better to slightly overfill and carefully scrape it away than to underfill.
Attempting to Repair Unfit Damage
This is the cardinal sin of DIY repair. Trying to fix a long windshield crack, damage in the driver’s line of sight, or edge damage is destined to fail. You will waste your time and money and likely make the problem worse, necessitating a more expensive windshield replacement.
Solution: Be brutally honest in your initial damage assessment. If it doesn’t meet the strict criteria, stop and call a certified technician.
How Long DIY Repairs Typically Last
It’s crucial to understand that a DIY fix is almost always a temporary solution. So, how long does DIY windshield repair last? While a professional repair can last the life of the vehicle, a DIY repair might last anywhere from a few months to a couple of years.
The average lifespan is 6-12 months before issues like yellowing, cracking, or debonding begin to appear. It is highly vulnerable to temperature swings, road vibrations, and car washes. The inferior resin hardening from sunlight curing means it remains more brittle and prone to failing sooner than a professionally cured repair. This short lifespan is a key reason many drivers ultimately seek a windshield replacement after a DIY attempt fails.
The Unforeseen Dangers and Risks of DIY Windshield Repair Kits
The risks of a botched DIY windshield repair extend far beyond a simple eyesore. They can compromise your safety, your finances, and even your legal standing. Understanding these unforeseen dangers and risks is essential for making a truly informed decision that goes beyond the initial low cost of a kit.
Compromised Structural Integrity
Your windshield is a critical part of your car’s safety system. It provides up to 45% of the structural strength to the passenger cabin in a front-end collision and is essential for the proper deployment of your airbags, which are designed to bounce off the glass to protect you.
A poor DIY repair creates a weak spot. In an accident, this spot can fail, causing the roof to collapse or the airbag to deploy incorrectly. This compromised structural integrity poses a grave safety hazard to you and your passengers.
Obstructed Vision and Aesthetic Imperfections
A primary function of your windshield is to provide a clear, undistorted view of the road. DIY repairs frequently fail in this regard.
Bubbles and Cloudiness
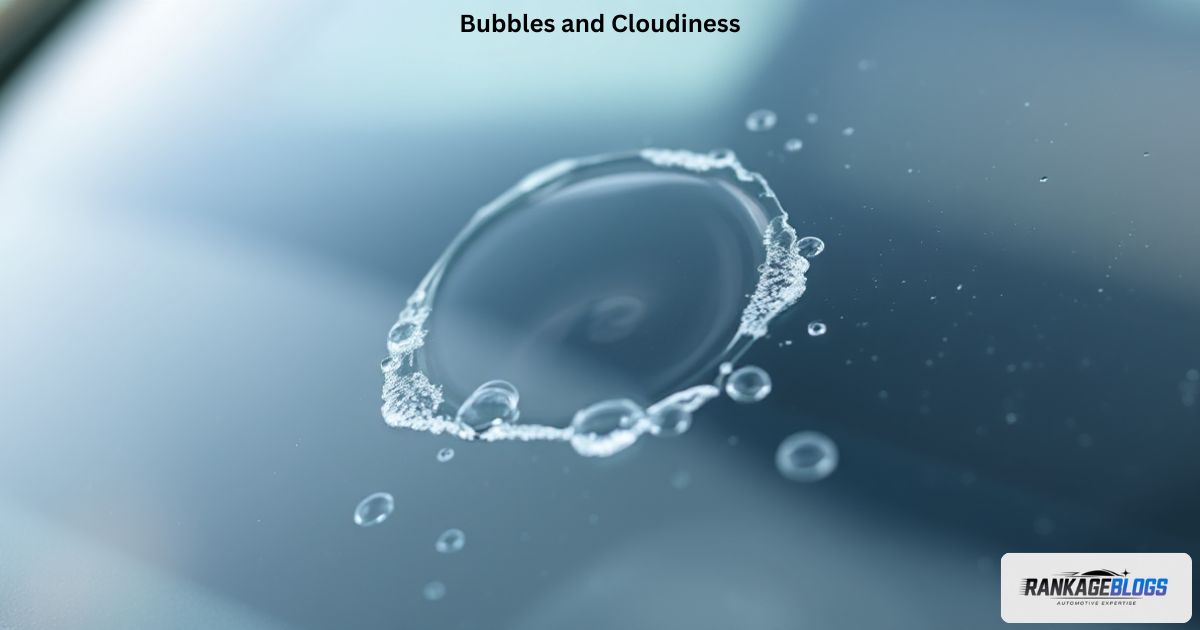
Improper resin application or curing almost guarantees imperfections. Air bubbles trapped inside the repair scatter light, creating a cloudy or frosted appearance. This cloudy glass can significantly obscured vision, especially at night or in bright sunlight, making it difficult to see pedestrians, other vehicles, or road hazards.
The “Wavy Glass” Effect
Even if the resin is clear, if the surface isn’t perfectly leveled after curing, it can create a prism effect. This “wavy glass” effect distorts everything you see through that spot, creating a moving blur that is incredibly distracting and dangerous. This severe visual distortion is a common reason people seek a professional repair after a failed DIY attempt.
Health and Safety Hazards of DIY Kits
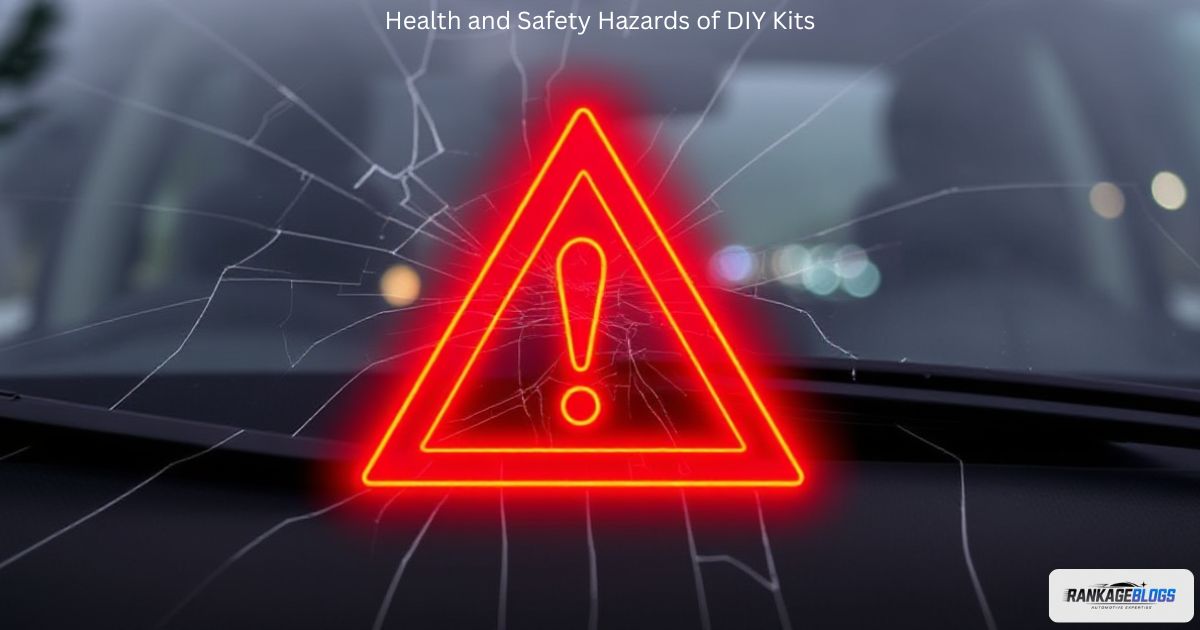
The process itself carries immediate physical risks that are often overlooked.
Toxic Fumes and Chemicals
The repair resin in many kits contains volatile chemicals that release toxic fumes. Inhaling these fumes in an enclosed space can cause dizziness, respiratory irritation, and headaches. Long-term exposure risks are unknown, making ventilation absolutely critical. This is a significant health risk that professional technicians manage with professional-grade equipment.
Risk of Personal Injury
You are working with broken glass. Without the protective gear mentioned earlier, you are at risk. Tiny, nearly invisible shards can flick into your eyes, and sharp glass edges can cause deep cuts from the sharp edges of the windshield crack or from the razor blade used for cleaning and scraping. This risk of personal injury is ever-present.
Voided Warranties and Insurance Complications
A DIY auto glass repair can have serious financial and contractual repercussions. This is a critical warranty concern that many car owners overlook.
- Manufacturer Warranty Voidance:Many new car warranties and extended service contracts explicitly state that glass repairs must be performed by a certified technician to remain valid. Performing a DIY job can void your manufacturer’s warranty for any subsequent issues not just related to the glass, but potentially for the roof structure, airbag system, and ADAS calibration, as these are all connected to the windshield’s integrity.
- Insurance Complications:Furthermore, if your DIY repair fails and leads to a larger crack, your insurance coverage may deny the claim for the subsequent windshield replacement. They will argue the initial repair was not performed to industry standards, leaving you to pay the full cost out-of-pocket.
Legal Considerations for Self-Repairs
This is an often-overlooked area of significant risk. If your DIY repair results in significant impaired visibility or optical distortions in the driver’s line of sight, you could be pulled over and issued a ticket for an equipment violation. This is because most states have laws prohibiting obstructions on the windshield that impair a driver’s view.
More gravely, if a failed repair contributes to an accident because you couldn’t see clearly or the glass failed, you could be held liable. The other party’s insurance would argue your negligent repair was the cause, leading to potential massive financial liability. This legal and financial risk is a powerful argument for opting for a guaranteed professional repair.
The False Economy: Why DIY Often Costs More
The initial upfront price of a DIY kit is seductively low. However, this is a classic false economy. If the repair fails—which is statistically likely—you will still need to pay for a professional repair.
Worse, if the DIY attempt made the damage worse, a simple repair may no longer be possible, forcing you to pay for a complete windshield replacement, which is far more expensive. Suddenly, your “savings” have vanished, and you’ve spent more than if you had called a pro first.
The True Cost: DIY vs. Professional Repair Cost Comparison
The financial equation behind DIY vs professional repair cost is more complex than it appears. While the sticker price of a kit is low, the true, long-term cost comparison must factor in risk, potential failure, and the value of your own time. For many drivers, especially those with insurance, the math overwhelmingly favors professional service.
The Upfront Price of a DIY Kit
The apparent cost advantage of a DIY auto glass repair is clear. A consumer-grade windshield repair kit typically costs between $10 and $50 at an auto parts store or online. This low barrier to entry is what attracts most people. It feels like a negligible investment to potentially solve an annoying problem. This upfront price is the entire argument for the DIY path.
The Hidden Long-Term Costs of a Failed DIY Repair
This is where the calculation falls apart. If your DIY repair fails—which can happen immediately, months, or a year later—you are back at square one, but the problem is often worse. The original windshield chip may now be a longer windshield crack that is no longer repairable.
Now, you must pay for a full windshield replacement, which can cost $250-$800 or more. You have now paid for the kit and the replacement, making the total cost much higher than a single professional repair would have been. This answers the common query, “how much does professional repair cost?” in context—it’s often cheaper than the combined cost of a failed DIY attempt and the subsequent necessary fix.
How Insurance Coverage Affects the Real Cost
For the vast majority of drivers, this is the most important factor. Most auto insurance policies include comprehensive auto insurance coverage, which covers glass damage. Crucially, most companies waive the repair deductible for glass repair, meaning a professional repair costs you $0 out-of-pocket.
Furthermore, using an approved certified technician ensures the work is guaranteed and won’t affect your premiums. Since insurance coverage for DIY repair is non-existent, the real cost of going DIY is often higher than the $0 cost of using your insurance for a professional job. This makes the decision of when to replace windshield instead of repair? one best left to a professional assessment.
When to Avoid DIY and Call a Professional
Certain types of damage are absolute red flags that should immediately stop any DIY consideration. Recognizing these scenarios will save you from a guaranteed failed repair and direct you toward the safe, correct solution: calling a certified technician for a professional repair or windshield replacement.
Cracks Longer Than Six Inches
This is the most straightforward rule. Any windshield crack longer than six inches is too extensive for a DIY kit to handle. The structural integrity of the glass is too compromised, and the amount of repair resin in a consumer kit is insufficient to properly fill and bond such a large area. Attempting this will result in a weak repair that will quickly fail. A crack of this size requires immediate professional assessment.
Damage in the Driver’s Line of Sight
Any damage—even a tiny chip—directly in the driver’s line of sight is an automatic disqualifier for a DIY fix. Even a professional repair can leave minor optical distortions.
In this critical area, any distortion, cloudiness, or “wavy glass” effect can create dangerous obscured vision, significantly increasing your risk of an accident. The safe choice is always professional repair with a guarantee of clarity or, if necessary, replacement.
Multiple Chips or Cracks
A windshield with several points of damage is a sign of overall weakness. A DIY kit is designed for a single, isolated repair. Trying to fix multiple chips or cracks is impractical and ineffective.
The cumulative damage severely weakens the glass, and patching one spot does nothing for the others. This situation requires a professional evaluation to determine if the entire windshield replacement is the only safe option.
Advanced Vehicle Technology
As discussed, modern vehicles with Advanced Driver Assistance Systems (ADAS) require special handling. If your car has a camera module behind the rearview mirror for features like automatic braking or lane departure warnings, a DIY repair is too risky.
The necessity of professional recalibration after the glass is touched makes this a job strictly for a certified technician with the proper calibration equipment. You cannot perform ADAS calibration in your driveway. This essential ADAS recalibration process ensures your safety features like automatic braking and lane assist work with life-saving accuracy after any glass work.
The Professional Advantage: Why Experts Are the Safer Choice
When you choose a professional repair, you are paying for more than just labor; you are investing in expertise, guarantees, and peace of mind. The professional advantage lies in the quality of materials, the precision of the work, and the security that comes with knowing the job was done right and is backed by a warranty.
On the other hand, If you’re looking for a DIY-friendly project that prevents damage rather than repairing it, consider a protective coating. For a detailed comparison of do-it-yourself protection options, our Auto Glass Protection Film & Coating Complete Guide breaks down which solutions are truly feasible for home installation.
Expertise and Precision
A certified technician is trained to handle a vast array of damages. Their expertise and precision come from experience; they know exactly how to approach each unique windshield crack or chip type to achieve the best possible clarity and strength. They avoid the common mistakes DIYers make, ensuring a clean, bubble-free repair that preserves structural integrity and visibility.
High-Quality Materials and Equipment
Professionals don’t use store-bought kits. They use commercial-grade repair resin with superior optical clarity and bonding strength. They use high-power UV light systems that harden the resin completely within minutes, unaffected by external weather conditions. For replacements, they use OEM standards glass or high-quality equivalents that match the original manufacturer’s specifications.
Warranty and Peace of Mind
This is a significant differentiator. A professional repair from a reputable shop almost always comes with a lifetime warranty on the workmanship. If any issue arises with the repair—it cracks, discolors, or fails—they will fix it or replace the windshield at no cost to you. This warranty and peace of mind is invaluable and completely absent from the DIY approach.
Insurance Coverage and Convenience
As outlined, most insurance coverage policies fully cover professional glass repair with no repair deductible. This makes the real cost of a professional job $0 for most drivers. Furthermore, many shops offer mobile service, coming to your home or office to perform the repair, adding a layer of convenience that a DIY project can never match.
Conclusion: Making the Informed Choice
Summary: The journey through the world of DIY auto glass repair reveals a landscape filled with significant risk. While the appeal of a low-cost, quick fix is understandable, the reality is that these kits have a very narrow window of applicability. The potential for compromised structural integrity, obscured vision, voided warranties, and ultimately higher costs makes the DIY path fraught with peril for most drivers.
Final Recommendation: For safety, clarity, and long-term value, professional repair is overwhelmingly the recommended choice for most drivers. The expertise of a certified technician, the quality of their materials (including OEM standards glass for replacements), the backing of a warranty, and the likely $0 cost through insurance make it the smart, safe, and financially prudent decision.
To get a quote for windshield repair or find a certified auto glass technician, contact a local reputable shop. Use the information in this guide to assess your damage honestly, and when in doubt, always err on the side of caution by consulting a professional. Your safety on the road is worth far more than the price of a DIY kit.
FAQs
Do DIY auto glass repair kits really work?
Yes, but only for very small chips as a temporary fix; they often fail to restore clarity or structural integrity and are not a permanent solution.
Is it better to repair a windshield chip myself or hire a professional?
Hire a professional—DIY repairs risk safety, often lack durability, and may cost more long-term if botched.
What is the best DIY windshield repair kit?
Rain-X and Permatex are among the top-rated kits for clarity and ease of use, but results vary.
What tools do I need for a DIY auto glass repair?
Essential tools include resin, an applicator syringe/bridge, UV light or curing strips, a razor blade, and safety gear.
How do I use a DIY windshield repair kit step-by-step?
Clean the damage, inject resin using the applicator, cure it with UV light/sunlight, and scrape off excess residue.
What are the biggest risks of trying a DIY windshield repair?
Risks include obscured vision from poor resin clarity, weakened glass integrity, and voided warranties/insurance.
How long will a DIY rock chip repair last?
Typically 6-12 months before yellowing, cracking, or peeling occurs; professional repairs last years longer.
How can I stop a windshield crack from spreading immediately?
Apply clear tape over the crack temporarily and avoid temperature changes or vibrations until professionally repaired.
Can I use an auto glass repair kit on a phone screen or other non-automotive glass?
No—these kits contain chemicals designed for laminated auto glass and will damage phone screens or other glass types.
Will a DIY repair void my car’s warranty or insurance coverage?
Yes, if the repair fails and causes further damage, your manufacturer warranty and insurance claim may be denied.